LiveShell X

How to check device ID

It is possible to register multiple LiveShell series devices to a single Dashboard account and those devices are managed via unique device IDs. Follow the below instructions to check the device ID of a unit.

1. Make sure the home screen is displayed on the device. The home screen has a power icon and a spanner icon.

2. Push the lower right button once or several times (the number of times will vary depending on the broadcasting situation).

3.”ID:xxxxxxx” will be shown on the device display and this is the device ID.

How to delete an unused device ID

LiveShell series devices are managed via device IDs on Dashboard.
SnapCrab_Dashboard LiveShell PRO - Google Chrome_2016-7-11_10-19-48_No-00

Currently device IDs can not be deleted by end users.

If you have LiveShell devices IDs that you want to remove, please inform our support team (support-global@cerevo.com) of your registered Dashboard email address and the unused device IDs you want to delete so they can be removed.

How to change language

Japanese -> English

1. Make sure LiveShell X is offline and the home screen is displayed. The home screen has a power icon and a spanner icon.

2. Press the upper right button, then go to “設定” (Configuration).

3. Select  “言語” (language) by pushing the lower right or left button, then press the upper right button.

4. Select ”English” by pushing the lower right or left button, then press the upper right button.

English -> Japanese

1. Make sure LiveShell X is offline and the home screen is displayed. The home screen has a power icon and a spanner icon.

2. Press the upper right button, then go to “Configuration”.

3. Select  “language” by pushing the lower right or left button, then press the upper right button.

4. Select ”日本語” by pushing the lower right or left button, then press the upper right button.

Live streaming to unofficially supported services

As of July 2016, LiveShell X officially supports Ustream, YouTube Live, Twich, Niconico Live and Twitcasting.
However it may possible to broadcast to other services if those services provide a RTMP URL and stream name (stream key), due to the wide varitery of different services available we cannot guarantee compatability with every service.

If you have issues connecting to an RTMP streaming service, please contact the streaming provider to check the service is compatible with your LiveShell device.

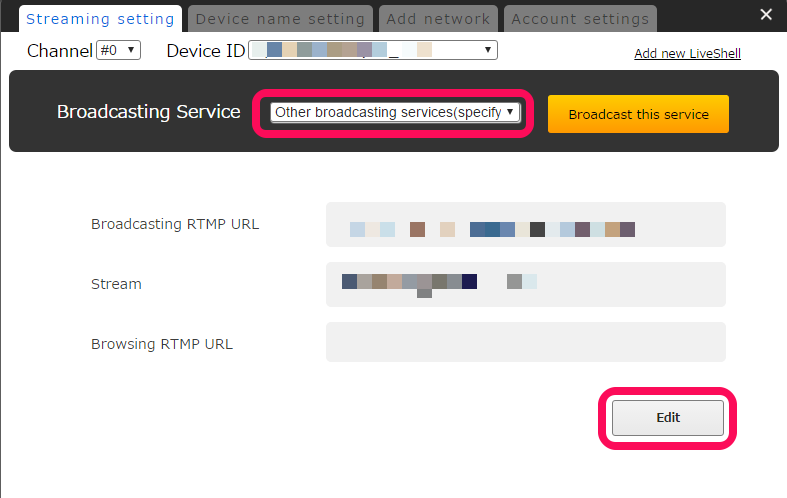
To broadcast to an unofficially supported service, please select “Other broadcasting services (specifiy RTMP URL)” from the “Broadcasting Service” dropdown in Dashboard. Please check this link for more details.
ub250_other_edit

How to broadcast to Facebook Live

LiveShell X can broadcast to Facebook Live by following the below instructions.

Facebook Live Restrictions
*Dashboard preview is not available.
*Broadcasting to an individual account is not available, you may only broadcast to a Facebook page.
*Please check Facebook’s own official guide if you are having any issues.

1.Get RTMP URL and stream key

1-1. Open a browser window, login to your Facebook account, go to your managed page and click on [Publishing Tools] in the page controls menu.
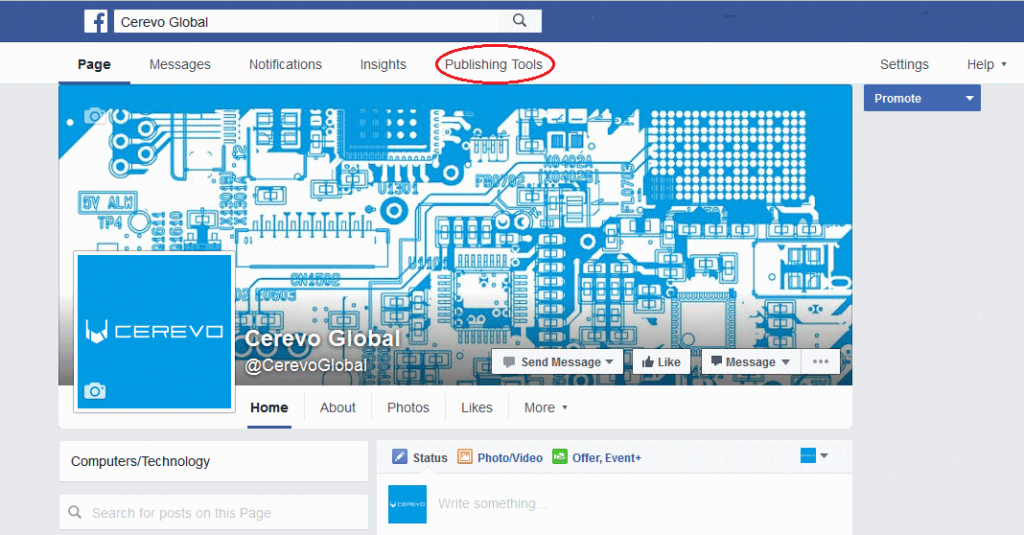
fblive1a

1-2. On the publishing tools screen click [Videos] on the left hand menu then click the [+Live] button.
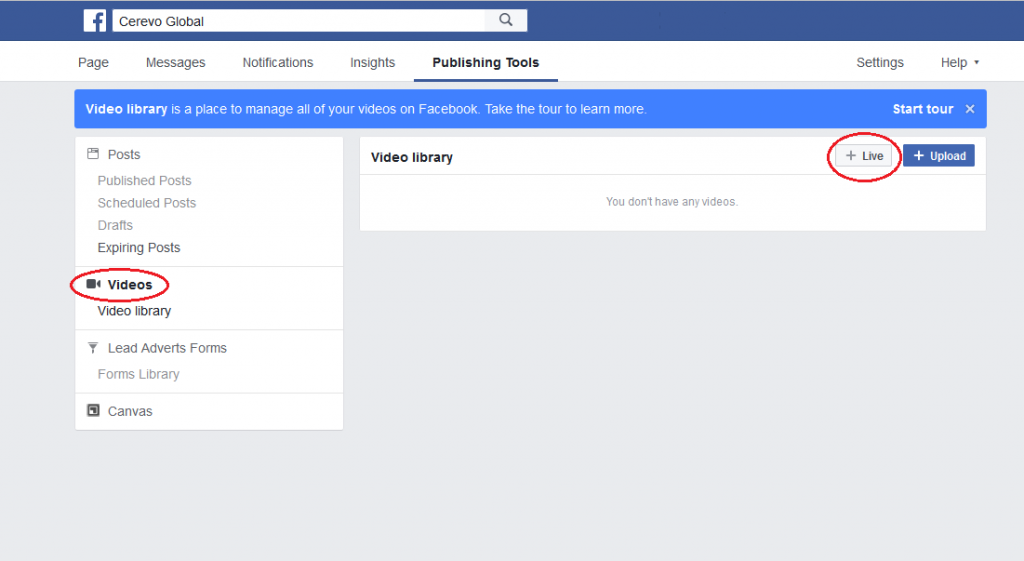
fblive2

1-3. On the Create live video window, make a note or copy the [Server URL] and [Stream key] fields.
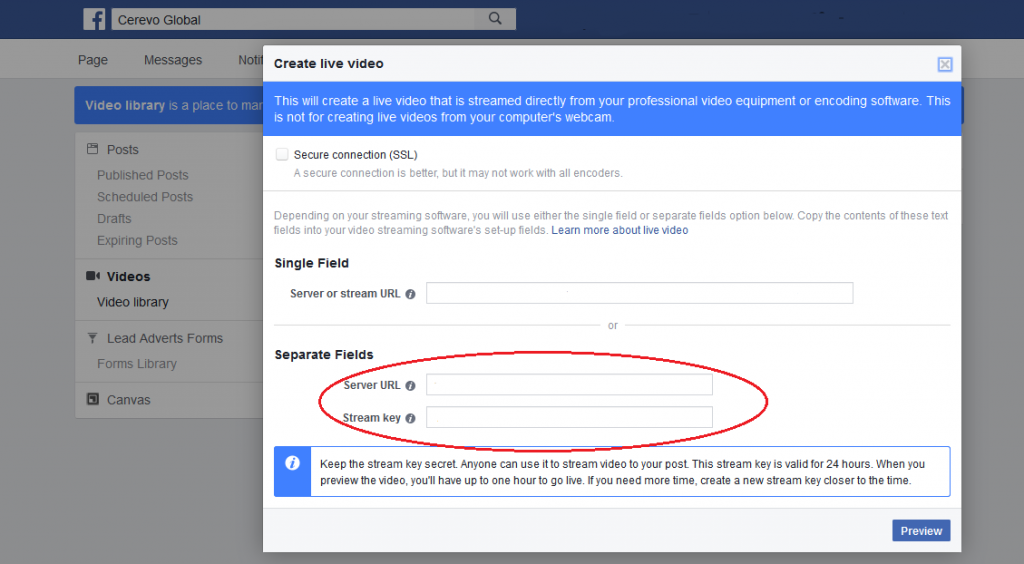
fblive3

2.Dashboard settings

2-1. Access Dashboard and login to your Dashboard account.

2-2. Click [Settings] on the top right of Dashboard.
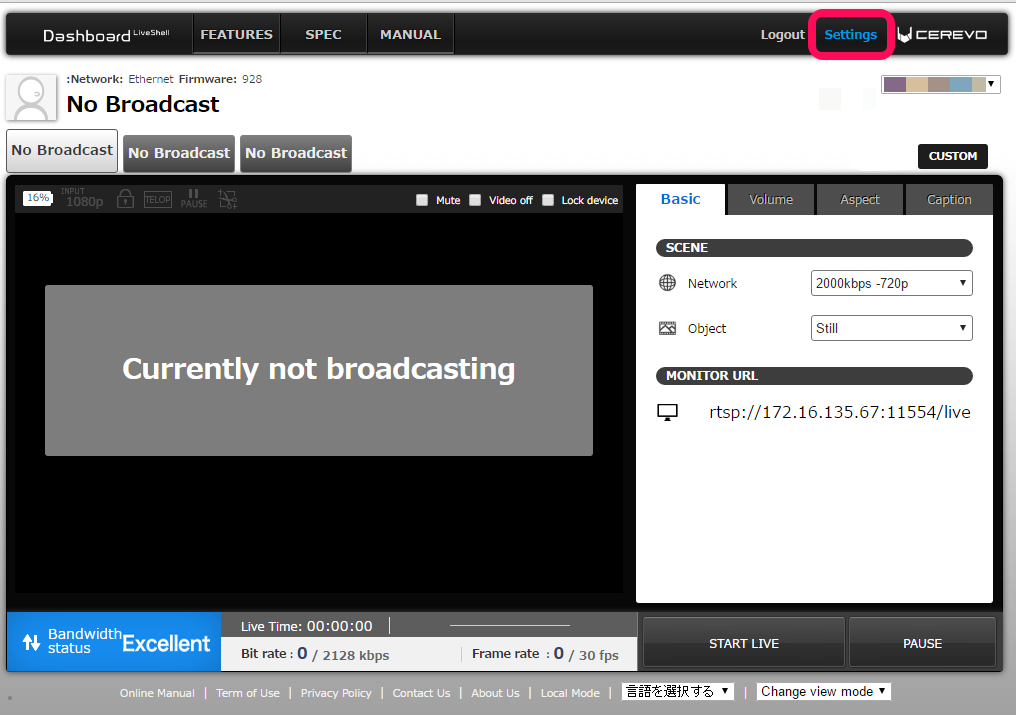
ub250_dashboard_add_network

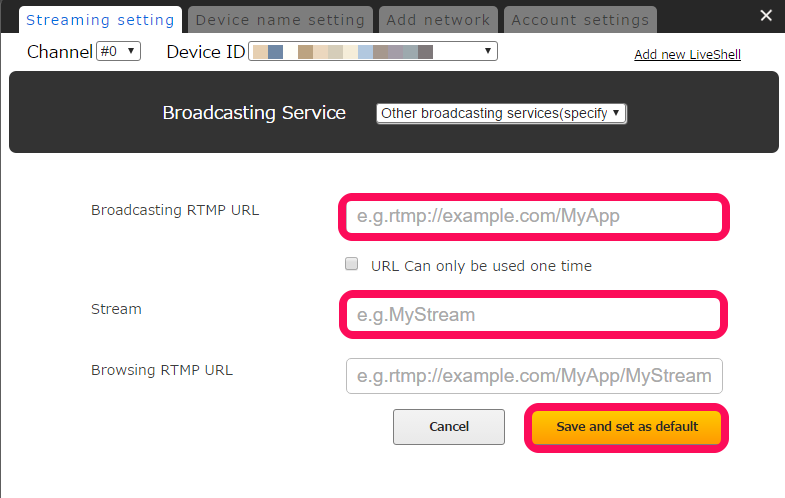
2-3. Select [Other broadcasting services (specify RTMP URL)] from the pulldown list of Broadcasting Services.

2-4. Enter the RTMP server information from Facebook as follows –
Server URL>Broadcasting RTMP URL
Stream key>Stream
Leave [Browsing RTMP URL] blank.

2-5. Click the [Save and set as default] button. Then click [x] to close the set up window.
ub250_other_enter_info

3.Start broardcasting

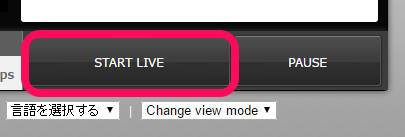
Click [START LIVE] on Dashboard.
ub250_rtsp_start

How to broadcast to a YouTube Live backup server

YouTube Live provides the option of using a back up server, using a back up server may solve connection problems when there are issues with the primary server.

Follow the below instructions to add a backup broadcasting server.

1.Get RTMP URL and stream name

1-1. Complete YouTube Live broadcasting setup. For details see this link.

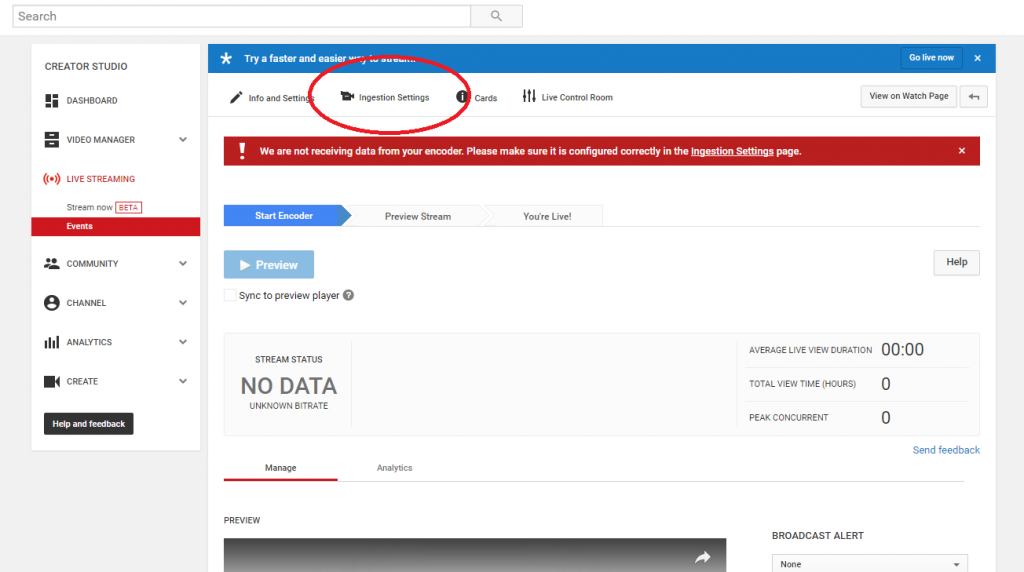
1-2. Click [LIVE CONTROL ROOM] on Dashboard.
3

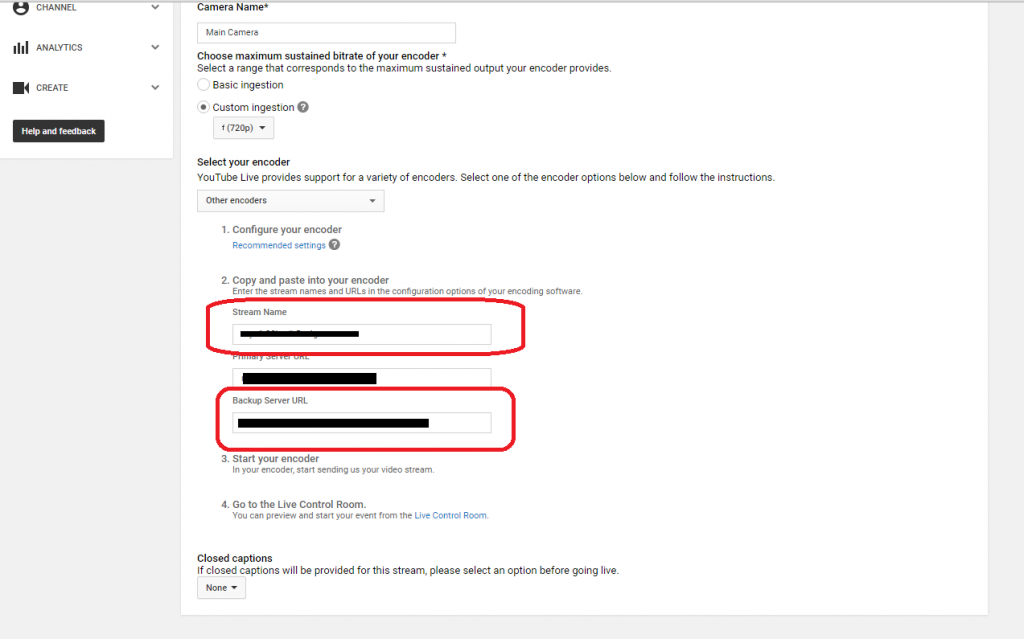
1-3. Click [Ingestion Settings]
4

1-4. Note or copy “Stream Name” and “Backup Server URL”
5

2.Dashboard settings

2-1. Access Dashboard and login to your Dashboard account.

2-2. Click [Settings] on the top right of Dashboard.
ub250_dashboard_add_network

2-3. Select [Other broadcasting services (specify RTMP URL)] from the pulldown list of Broadcasting Services.

2-4. Enter the RTMP server information from YouTube as follows –
Server URL>Broadcasting RTMP URL
Stream key>Stream
Leave [Browsing RTMP URL] blank.

2-5. Click the [Save and set as default] button. Then click [x] to close the set up window.
ub250_other_enter_info

3.Start broardcasting

Click [START LIVE] on Dashboard.
ub250_rtsp_start

Broadcasting to Ustream with RTMP URL and stream name (stream key)

LiveShell X officially supports Ustream and LiveShell X users can select “Ustream” from the “Broadcasting Service” menu.
6

It is also possible to broadcast to Ustream by specifying the RTMP URL.

Please follow the below instructions to setup via this method.

1.Get RTMP URL and Stream name (stream key)

1-1.Access Ustream and log in your Ustream account.
7

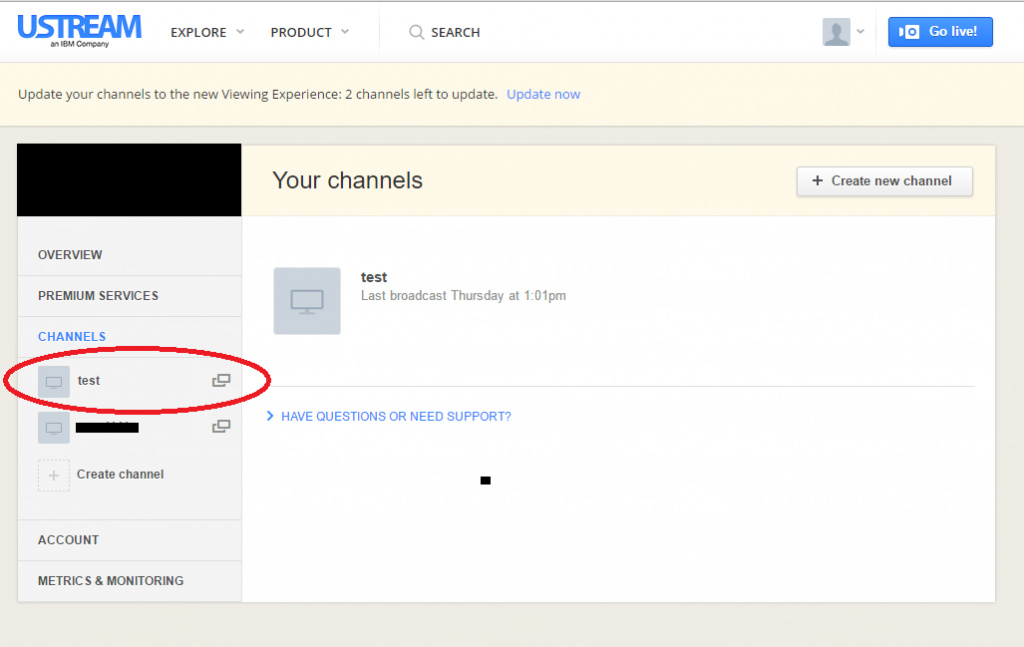
1-2. Click [Channel settings]
8

1-3. Click the channel want to broadcast.
9
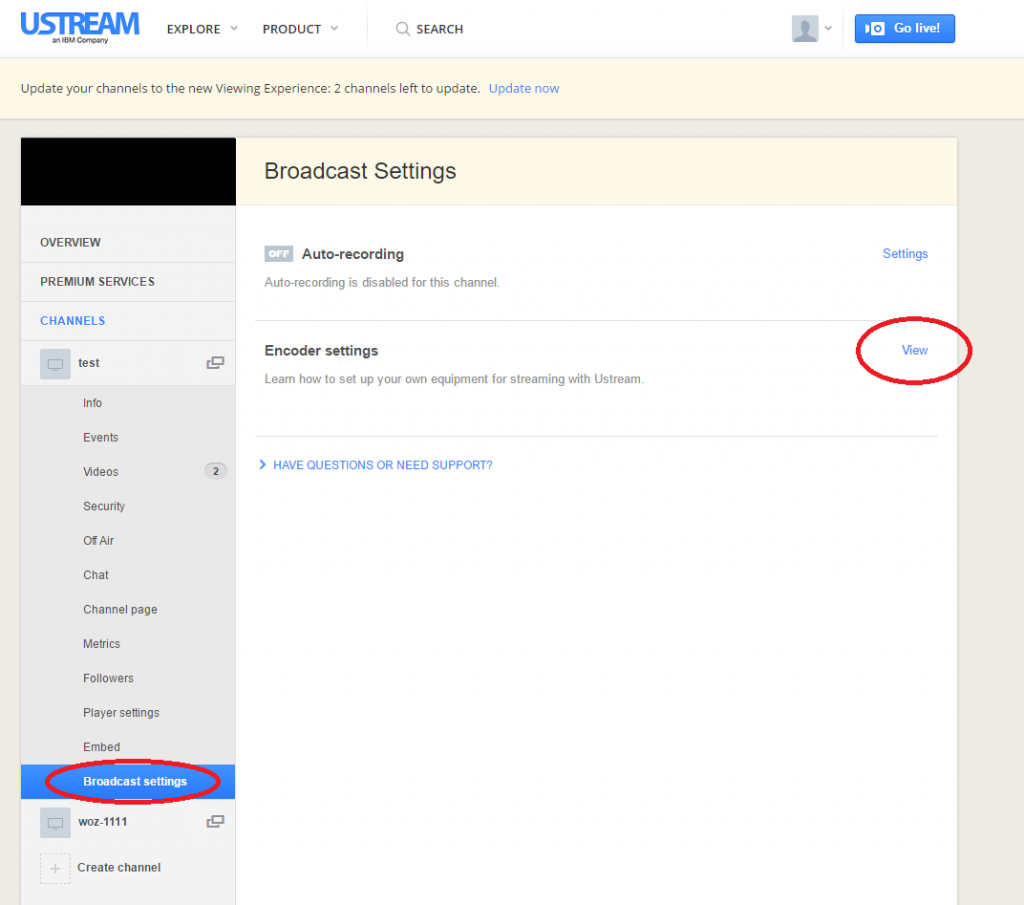
1-4. Click [Broadcast settings] and [View]
10

1-5. Note or copy the RTMP URL and Stream Key.
11

2.Dashboard settings

2-1. Access Dashboard and login to your Dashboard account.

2-2. Click [Settings] on the top right of Dashboard.
ub250_dashboard_add_network

2-3. Select [Other broadcasting services (specify RTMP URL)] from the pulldown list of Broadcasting Services.

2-4. Enter the RTMP server information from Facebook as follows –
Server URL>Broadcasting RTMP URL
Stream key>Stream
Leave [Browsing RTMP URL] blank.

2-5. Click the [Save and set as default] button. Then click [x] to close the set up window.
ub250_other_enter_info

3.Start broardcasting

Click [START LIVE] on Dashboard.
ub250_rtsp_start

About live streaming delays

A delay from several seconds to a few minutes can occur between the LiveShell X video input and preview display on Dashboard or live video stream.

This delay is caused by RTMP server processing, network routing between LiveShell X and the RTMP server and the physical location of each server in the route. The delay is unavoidable and cannot be made shorter by changing settings on LiveShell X or Dashboard.

Enable/Disable auto broadcasting when online

It is possible to change which action LiveShell X takes when first online.

If LiveShell X is online

1. Make sure the home screen is displayed on the device. The home screen has a power icon and a spanner icon.

2. Press the upper right button and go to “Broadcasting”.

3. Select “Auto Control” and press the upper right button.

4. Select Auto Start/None/Follow ch#X and press the uppaer left button.

If LiveShell X is offline

1. Make sure the home screen is displayed on the device. The home screen has a power icon and a spanner icon.

2. Press the upper right button, then go to “Configuration”.

3. Select “Broadcasting” and press the upper right button.

4. Select “Auto Control” and press the upper right button.

5. Select Auto Start/None/Follow ch#X and press the upper left button.