LiveShell X

4-1. Dashboard operation

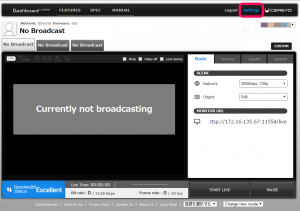
Top of Broadcast Screen

do1

Mute: Turns off audio while video continues to broadcast.
Video off: Turns the video off while captions continues to broadcast.
Lock device: Locks the control buttons on the LiveShell X unit.


Right Menu

ub250_dashboard_right_side

Mail address
Registered Dashboard mail address.
Device ID
When two or more LiveShell or LiveShell X devices are connected, each device can be selected.
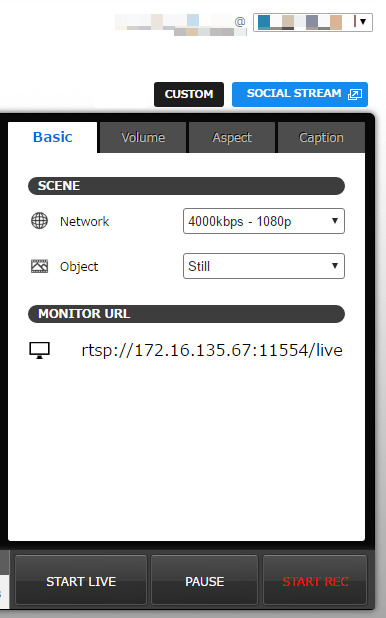
CUSTOM
Click this button to adjust advanced audio and video settings.
Please note the custom settings screen is designed for users experienced with online streaming terminolgy.
SOCIAL STREAM
Opens a pop-up chat window during streaming. (Ustream only)
STOP LIVE / START LIVE
Toggle Broadcasting between Stop and Start.
PAUSE / START
Toggle Broadcasting between Pause and Start.
START REC / STOP REC
Toggle recording between Start and Stop. (Ustream only)

Basic Tab

Network
This setting affects broadcasting video quality, and can be adjusted based on the internet connection speed.
Object
The default setting is “Still.” When broadcasting video with high motion content such as sports, please select the “moving” setting.
Aspect ratio
Adjust the video aspect ratio manually if automatic detection doesn’t work.

Volume Tab

Control audio output.

Aspect Tab

Adjust the video aspect ratio manually if automatic detection doesn’t work.
Caption Tab

See the Caption/pause image page.

4-1-1. Caption/pause image

Caption Tab

Create a new text caption

  1. Input desired text in the “Caption text” text box.
  2. Select text size, font type, text color, and background color.
  3. Click one of the gray boxes near “position” to place the caption in the desired position. A preview will be shown on the left of the screen.
  4. Click “Send” to insert the caption into the broadcast video.
    Click “Save” to save the created caption without inserting.
Create new image caption
  1. Click the “Image” button at the top of the tab.
  2. Click “Choose file” and select the desired image.
    * Uploaded file size limit is 1MB, .jpg, .png, and .gif images can be displayed. You can also use transparent images.
  3. A preview will been shown, the image can be adjusted by dragging to the desired position.
  4. Click “Send” to insert the image into the broadcast video.
    Click “Save” to upload and save the image without inserting.

Using saved captions

  1. Click the “Image” button at the top of the tab.
  2. Browse through the saved images by clicking the “Prev” and “Next” buttons at the bottom of the thumbnails.
  3. Select the desired thumbnail and a preview will been shown on the left of the screen.
  4. Adjust the position of the image as previously explained.
  5. Click “Send” to insert the image into the broadcasting video.  Note that if a image has already been inserted, this will replace the existing image.
  6. Click “Save” to save the position of the image without inserting.  Up to 32 images can be saved at a time.  If more than 32 captions are uploaded, newer images will replace older images.

Protect favorite images

  1. Click white star on upper left of the thumbnail.
  2. The star will then be turn yellow.
  3. Click “Show stars only” in order to display a list of favourited images.
    * A total of 16 stars can be allotted to caption and pause images.
    * Starred captions/images will not be deleted even if more than 32 captions/images have been saved.

Set pause image

You can set an image that will be displayed when broadcasting is paused or set to “video off.”

  1. Click the “Pause image” button at the top of the tab.
  2. Click “Choose file,” and select the image to be used while pausing.
  3. Click “Send” to set the pause image.
  4. To remove the pause image, click the “Remove pause on video” button.

4-2. Unit operation by control buttons

While the LiveShell X is offline, the device screen will display the following:
*If the unit is online, only the [Broadcasting] section options can be changed.

Network

Ethernet

  • Address Type
    • DHCP
    • Static Address
      • Address
      • Gateway
      • Netmask
      • DNS

USB modem New

Creates a new USB Modem setting.

  • Remove
  • Password
  • User name
  • APN

Wi-Fi New

Creates a new Wi-Fi setting.

Wi-Fi#1, Wi-Fi#2, …

  • Displays the information for the registered wireless LAN access point.
    Wireless LAN setting priorities are in numerical order.
    These settings can be removed individually or re-ordered in priority.
  • ESSID
    • Enter manually / Scan
  • Password
    • (enter manually)
  • Cipher Type
    • No Encryption / WEP / WPA/WPA2
  • Address Type
    • DHCP
    • Static Address
      • Address
      • Gateway
      • Netmask
      • DNS
  • Prioritize
    • Select this menu, and this Wi-Fi setting is set as Wi-Fi #1
  • Remove
    • Be careful that Wi-Fi settings will delete if you select this menu without confirmation

Wi-Fi MAC address

  • MAC address value of Wi-Fi adapter / Failed to get

Broadcasting

Video Stream #0 / #1 / #2 / #3

Quality
  • Preset
    • Network type
      • 3G Low / 3G High / ADSL / FTTH / FTTH2
    • Object type
      • Still / Moving
  • Customized
    • Video Kbps
      • 32 to 20K(20000Kbps)
    • Frame Rate
      • #0: 1 to 60
      • #1,2,3: 1 to 30
    • IDR frame interval
      • Default(1sec), 1 to 300frame
    • (H.264) Profile
      • High / Baseline / Main
    • Video Codec
      • H.264 / H.265
    • Rate Control
      • Framerate Vary / Quality Vary
    • Queue length
      • 0.004(1 in Dashboard) – 15.625(4000 in Dashboard)
Audio Stream
  • 0 / 1
Ustream Recording
  • Record / Not record
Aspect Ratio (Except #0)
  • Automatic / 4:3 / 16:9 / 4:3 (Side-Cut) / 16:9 (L-Box) / Manual
A/V Sync (Except #0)
  • Variable number
Overscan Rate (Except #0)
  • 0 to 1023
Auto Control (Except #3)
  • Do not stop / Stop
Stop Video
  • Do not stop / Stop
Mute
  • No Mute / Mute

Audio Stream #0 / #1

  • Audio kbps
    • 32 to 255
  • Channel
    • Stereo / Mono Right / Mono Left / Monoral

Audio Mixer

  • Master Volume
    • 0 (OFF) ~ 52 (+0.0dB) ~ 64 (+18.0dB)
  • HDMI Volume
    • 0 (OFF) ~ 52 (+0.0dB) ~ 64 (+18.0dB)
  • LINE Volume
    • 0 (OFF) ~ 32 (+0.0dB) ~ 40 (+12.0dB)

LED brightness

  • 0% ~ 100%

Automatic Boot

  • OFF / ON

Language

  • 日本語 / English

Initialize

  • No / Yes

Time diff.

  • -14:00 to +12:00

Time

  • Year/Month/Day/Hour/Minute

TinyCon

  • Enable TinyCon
    • No / Yes
  • Enable Auth.
    • No / Yes
  • Display Password
    • (A six digit number)
  • Change Password
    • 000000 / (A random six digit number)

Export to SD

  • No / Yes

Import from SD

  • No / Yes

(While Normal Mode)Go Local Mode

  • No / Yes

(While Local Mode)Local Mode

  • Stream Settings
    • #1 / #2 / #3
  • Go Normal Mode
    • No / Yes

5-1. Add network

Add/change network connection

Settings

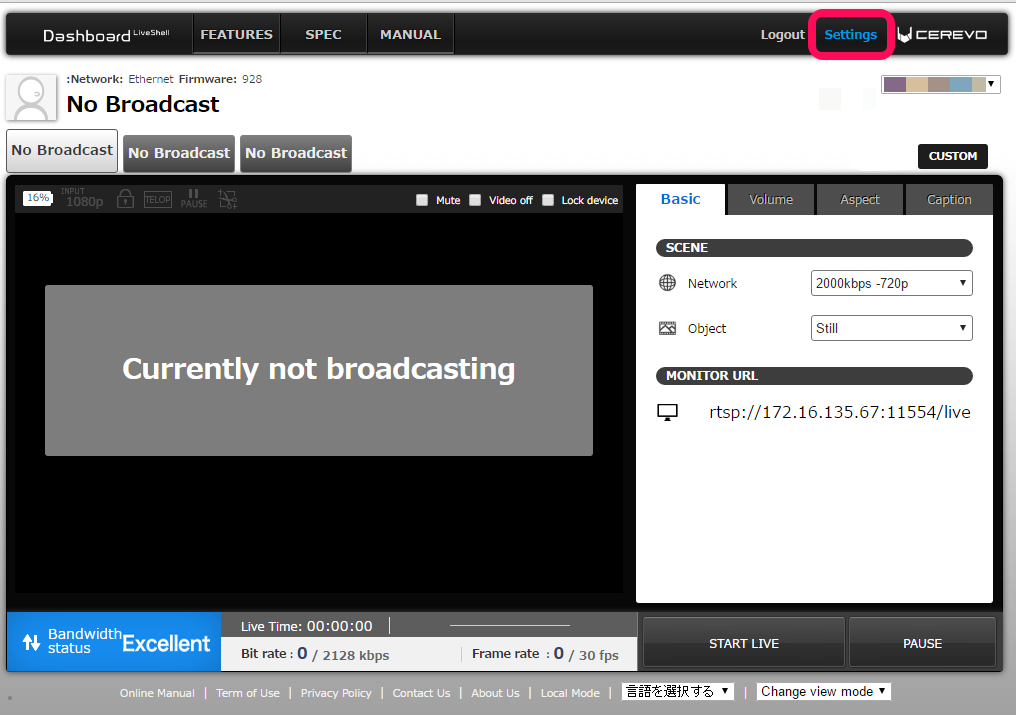
  1. Click the “Settings” link on the top right of Dashboard.
    ub250_dashboard_add_network
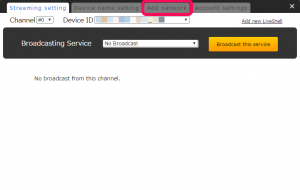
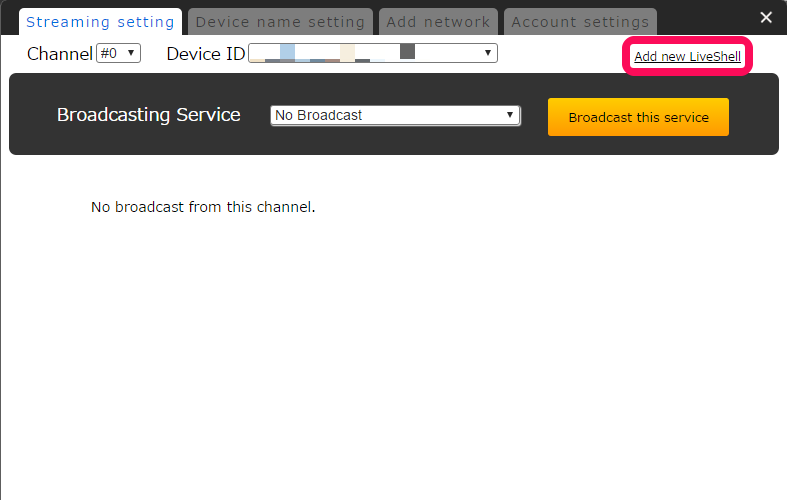
  2. Select the “Add network” tab.
    ub250_dashboard_select_add_network
  3. If you are adding a Wi-Fi network, click [Wireless(Wi-Fi)] from the left menu, enter the new ESSID and passphrase and click the [OK] button.
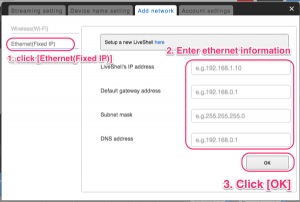
  4. If you are adding a static IP Ethernet network, click [Ethernet(Fixed IP)] from the left menu, enter the new Ethernet network information and click the [OK] button.
    ubx_en_cap_addnetwork88
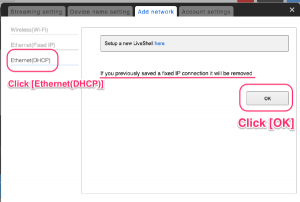
  5. If you are adding a new DHCP ethernet network, click [Ethernet(DHCP)] from the left menu and the click [OK] button. If you have previously added a static IP Ethernet connection it will be deleted.
    ubx_en_cap_addnetwork77
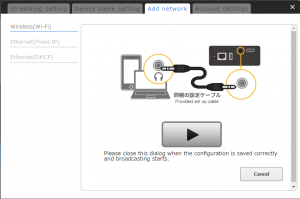
  6. Connect the cables as shown, and press the play button.
    ub250_dashboard_play_sound
  7. If [LIVE] is displayed on the device LCD screen, the new connection has been added successfully.

Note : Adding Ethernet network connection (DHCP)

If the new network being added can acquire the IP address through a DHCP server, a new configuration does not need to be added.

* Once the Ethernet cable is connected, the LiveShell X can be used.
* If the LiveShell is configured with a static IP address, the configuration should be changed to allow for a DHCP enabled network.
Note : Adding Wi-Fi networks

The most recently saved network is assigned the lowest number on the list (Wi-Fi No.). If the LiveShell X discovers multiple wireless APs, it will use the most recently added network.
  • The 10 most recent networks can be stored at any given time.
The LiveShell X cannot discover a stealth ESSID wireless AP, if one is being used, the access point will need to be reconfigured.

5-2. Dashboard user account settings

Account settings

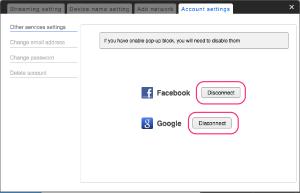
Link/Unlink your current Dashboard account with your Facebook or Google account. To link, see section 1-2-1.
ubx_en_cap_removeuserconnect

Change email address

  1. Click the “Settings” link on the top right of Dashboard.
    ub250_dashboard_add_network
  2. Select the “Account setting” tab.
  3. Enter current email address, new email address, and current password then click “OK.”
  4. The message “Check the sent email” will be displayed.
  5. Check your email account for an email from “[LiveShell Dashboard].” Click on the confirmation URL in the email.
    dashboard-mail3-en
  6. If the update was successful the updated email address will be displayed in the upper right corner of the screen.

Change password

  1. Enter the current password to log into Dashboard.
    Then, enter the new password you wish to use.
    For confirmation, re-enter the new password.
  2. Click “OK,” and the message “Changed” will indicate a successful change of password.

Delete Account

Click here to delete your Dashboard account.

5-4-1. Ustream account settings

To change saved Ustream account settings.

  1. Click “Settings” on the top right of Dashboard.
    ub250_dashboard_add_network
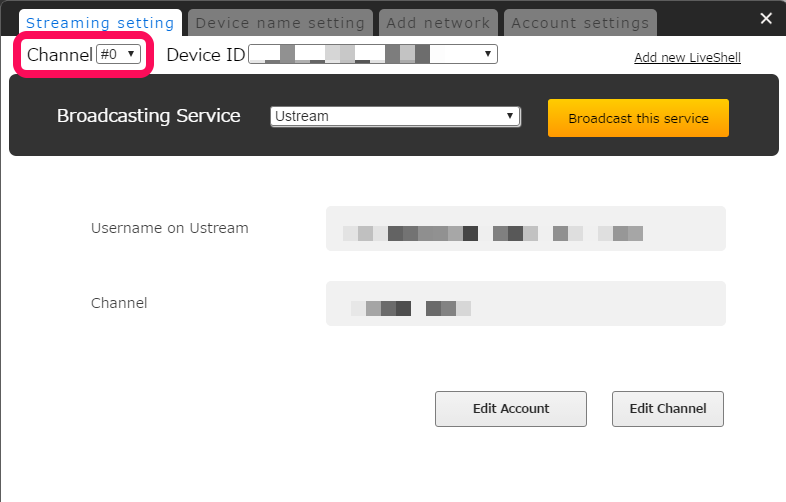
  2. Select the channel you want to set.
    ub250_select_channel
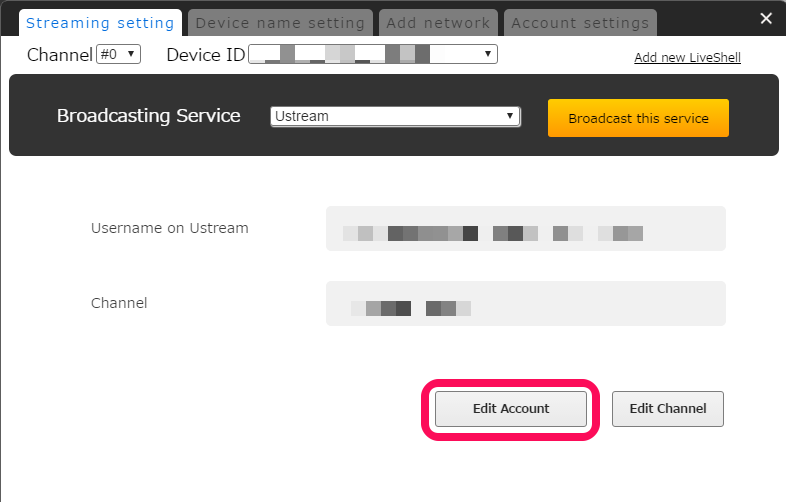
  3. Click “Edit Account.”
    ub250_ustream_edit_account
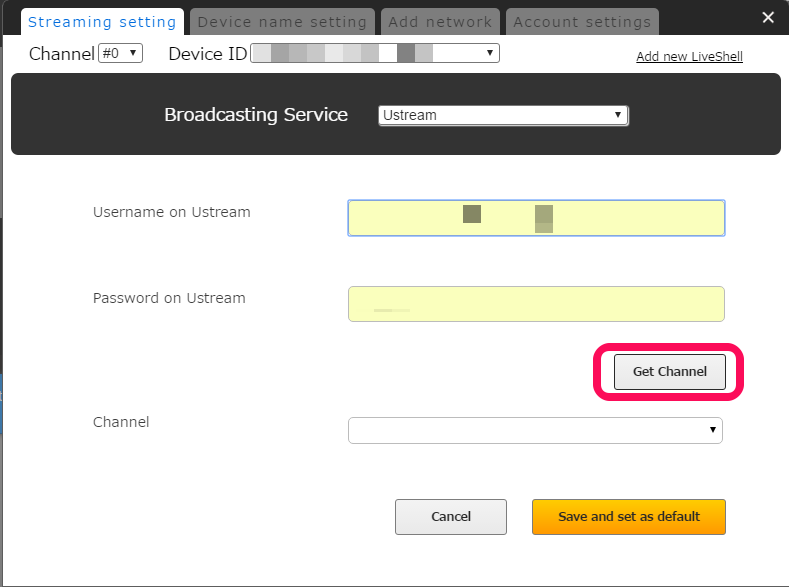
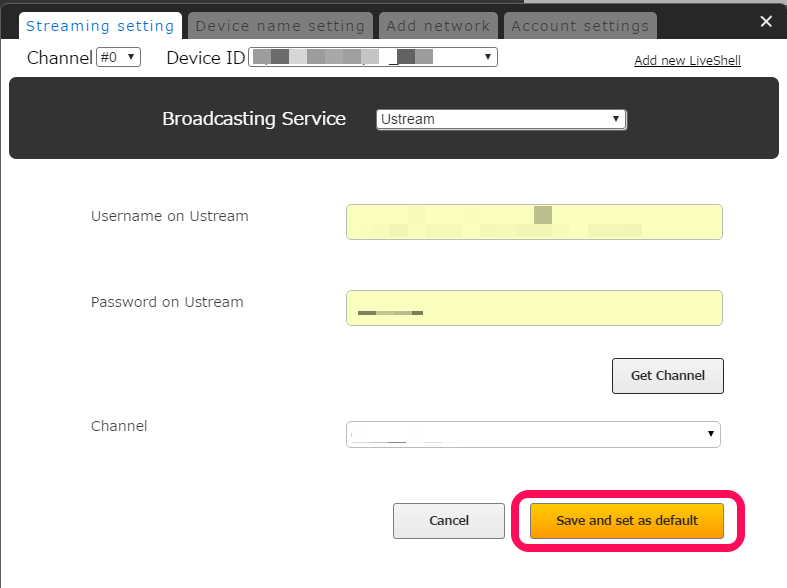
  4. Enter new account information for Ustream and click “Get Channel.”
    ub250_ustream_get_channel
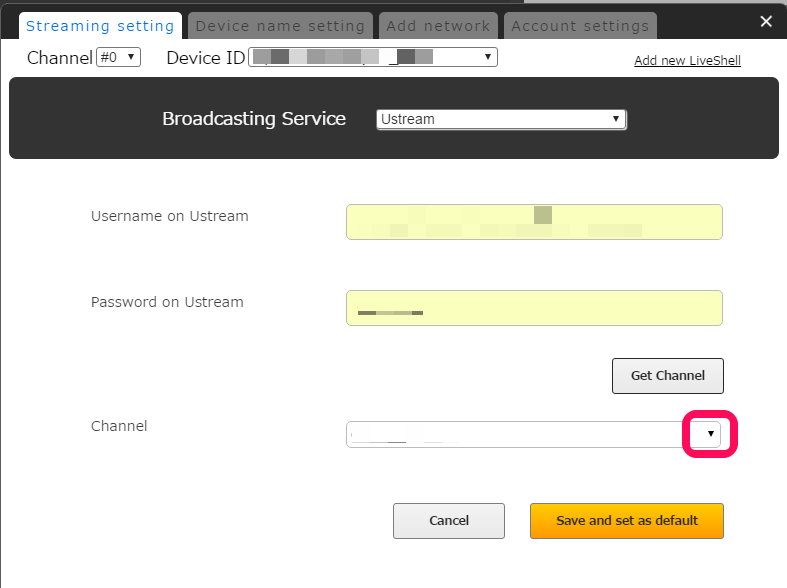
  5. Select a channel for broadcasting.
    * If the device is already using a channel, selecting another channel may cause errors.
    ub250_ustream_select_channel
  6. Click “Save and set as default.”
    ub250_ustream_save_default
  7. Dashboard will state “Saved and LiveShell will broadcast to this service next time.” when the Ustream account settings have been changed successfully.

5-4-2. Ustream channel settings

To change Ustream live streaming channels.

  1. Click “Settings” on the top right of Dashboard.
    ub250_dashboard_add_network
  2. Select the channel you want to set.
    ub250_select_channel
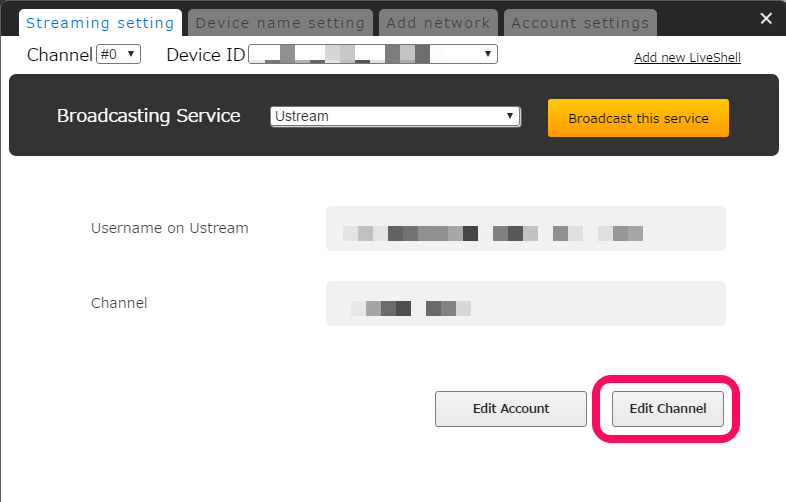
  3. Click “Edit Channel.”
    ub250_ustream_edit_channel
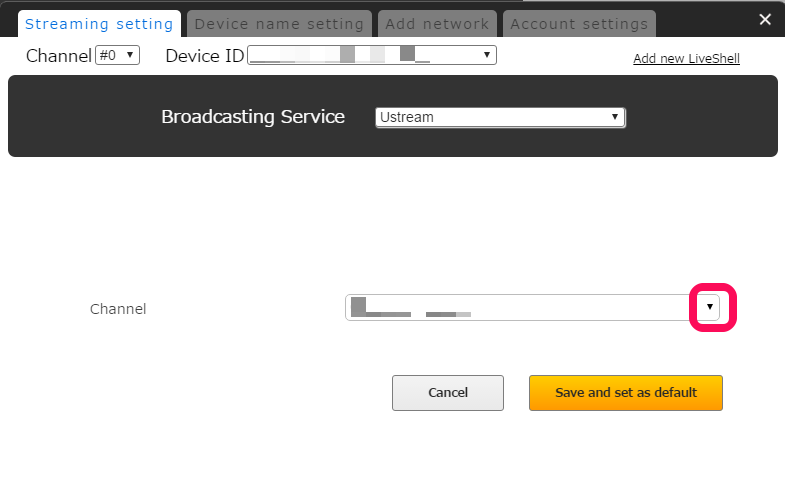
  4. Select a new broadcasting channel.
    * If the device is already using a channel, selecting another channel may cause errors.
    ub250_ustream_select_channel2
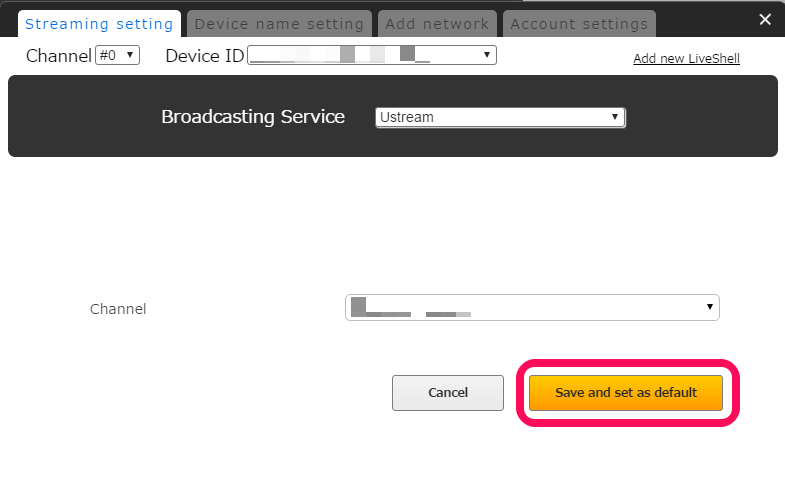
  5. Click “Save and set as default.”
    ub250_ustream_save_default2
  6. A message will read “Saved and LiveShell will broadcast to this service next time.” after successfully updating the broadcast channel.

5-5. Niconico live settings

Currently, due to a specification change on the platform side, only live-streaming via RTMP URLs, etc. is possible.
We will inform you of the normal live-streaming method as soon as it is available.
▶︎How to live-streaming at RTMP URLs

Note: To broadcast on [Niconico Live], you are required to have a niconico paid account and a community (group feature) authorized to broadcast. The steps below are valid as of March 2016, Cerevo cannot guarantee future accuracy.

Steps for broadcasting

    1. Access niconico and click [Community] on the header menu to create new one. If you have already created or joined a community authorized to broadcast, skip to step 6.
      ubx_en_cap_2525setting01
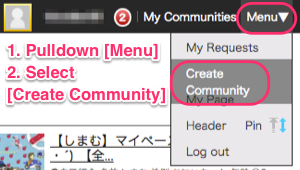
    2. Click [Menu] and select [Create community].
      ubx_en_cap_2525setting02
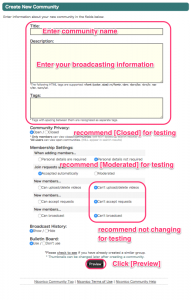
    3. Enter correct information to create a community and click the [Preview] button.
      ubx_en_cap_2525setting03
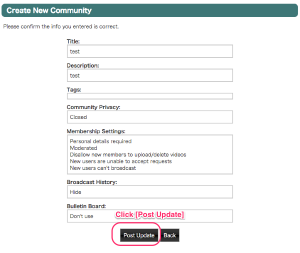
    4. Confirm your community information and click [Post Update].
      ubx_en_cap_2525setting04
    5. (Optional) We recommend you to click on your community name and bookmark your own community page.
      ubx_en_cap_2525setting05
    6. Click [Live] menu on the header menu.
      ubx_en_cap_2525setting06
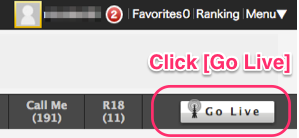
    7. Click [Go Live] under the [Menu] pull down from step 2.
      ubx_en_cap_2525setting07
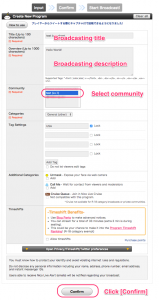
    8. Select the community you created in step 3 and enter broadcasting information, then click [Confirm].
      ubx_en_cap_2525setting08
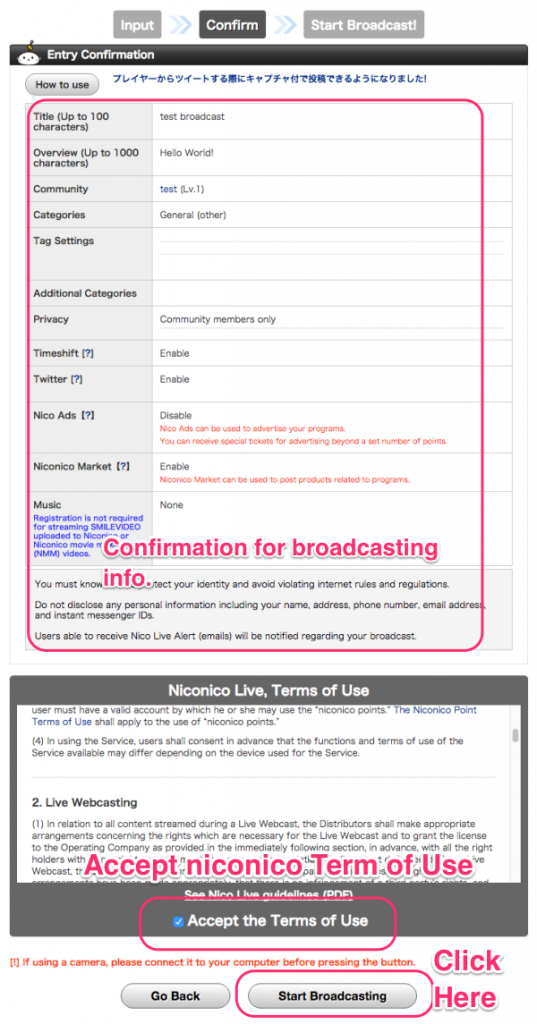
    9. Accept the niconico Live Terms of Use and then click [Start Broadcasting].
      ubx_en_cap_2525setting09
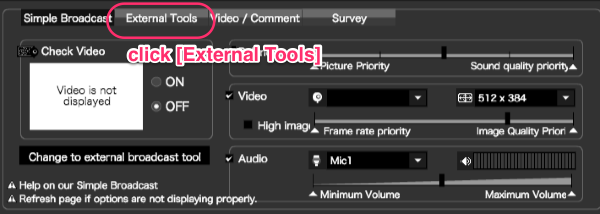
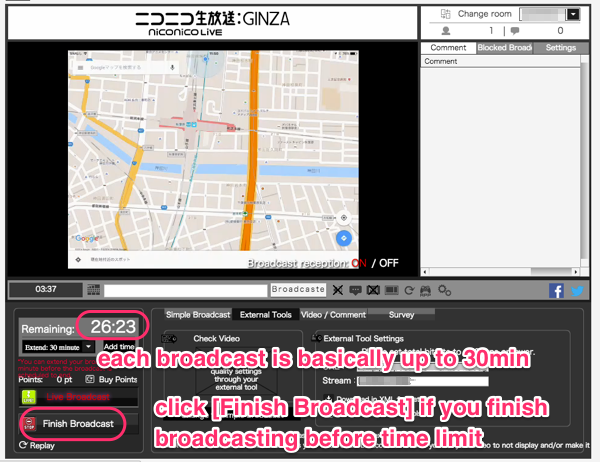
    10. On the Niconico Dashboard, click the [External Tools] tab at the bottom of the preview window.
      ubx_en_cap_2525setting10
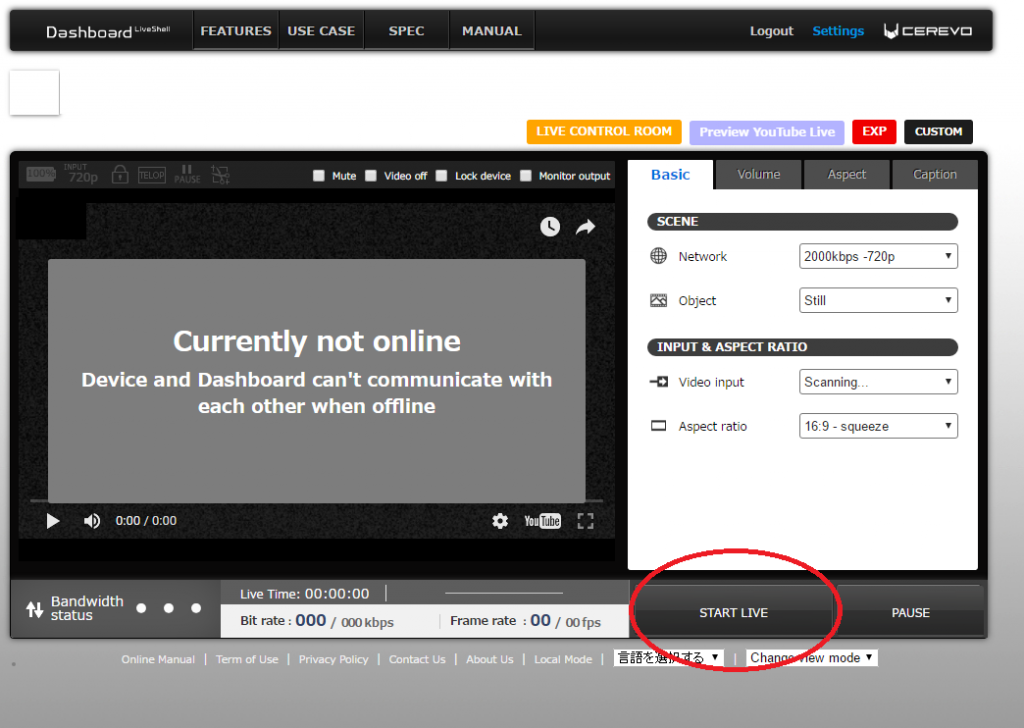
    11. Open another window or tab, and access to Cerevo Dashboard. If you didn’t set a niconico account on the Dashboard, see section 2-1b. step 3. Then click [START LIVE].
      ub250_niconico_start_live
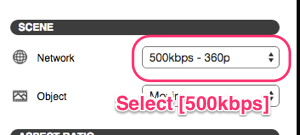
    12. Niconico live restricts video and audio bitrate at up to 384kbps (night time) and 512kbps (day time). Select the 500kbps preset on the right side of the Cerevo Dashboard preview window and confirm the bitrate below the preview window.
      ubx_en_cap_2525setting12

ubx_en_cap_2525setting13

  • If LiveShell 2 is broadcasting correctly, a [Please watch in NiconicoLive] message will display in the preview window. Due to niconico restrictions the stream cannot be displayed in the Cerevo Dashboard preview window.
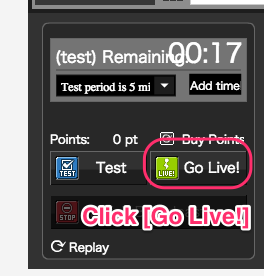
  • Preview your stream in the niconico Dashboard and then the click [Go Live!] button on the bottom left of the niconico Dashboard.
    ubx_en_cap_2525setting14
    ubx_en_cap_2525setting15


5-6. Other broadcasting service settings

*Please have your RTMP server address (URL) and other RTMP server information at hand before proceeding with these steps.

1.Dashboard settings

    1. Access Dashboard and login to your Dashboard account.
    2. Click [Settings] on the top right of Dashboard.
      ub250_dashboard_add_network
    3. Select the channel you want to set.
      ub250_select_channel
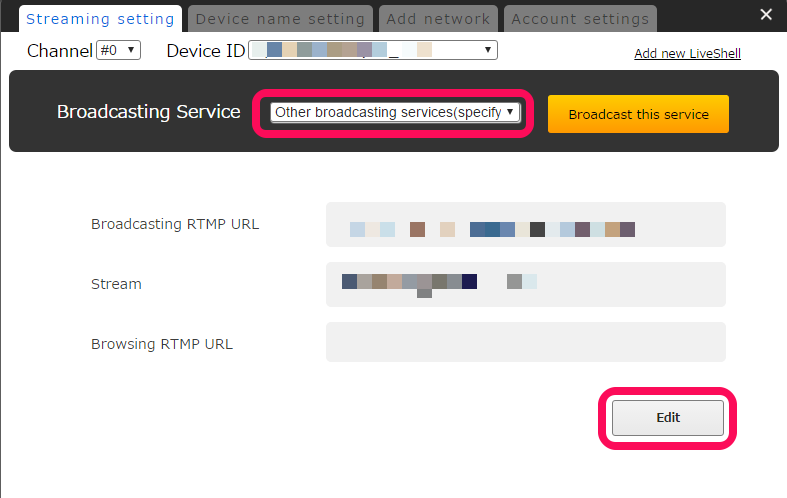
    4. Select [Other broadcasting services (specify RTMP URL)] from the pulldown list of Broadcasting Services.
      ub250_other_edit
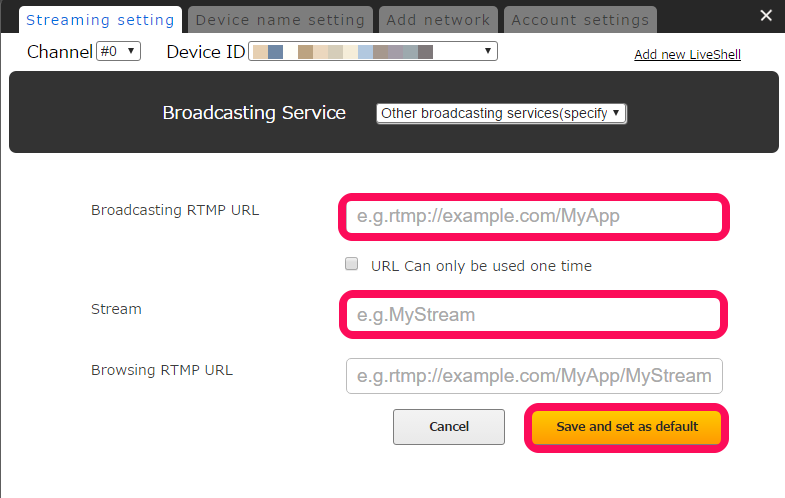
    5. Enter your server’s broadcasting RTMP URL and other information then click the [Save and set as default] button.
    6. Click [x] to close the set up window.

ub250_other_enter_info

2.Start broadcasting

Click [START LIVE] on Dashboard.
2