6. FAQ

Enable/Disable auto broadcasting when online

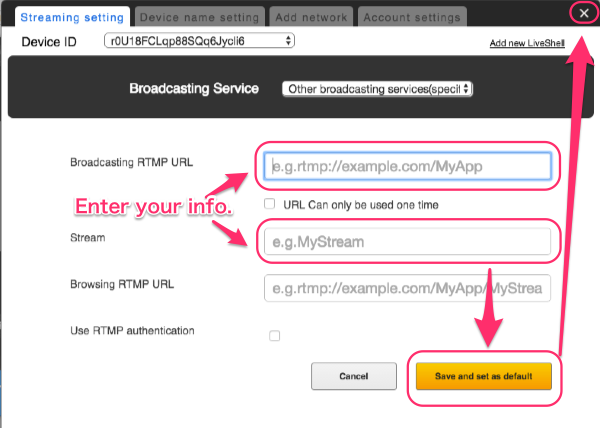
It is possible to change which action LiveShell PRO takes when first online.

If LiveShell PRO is online

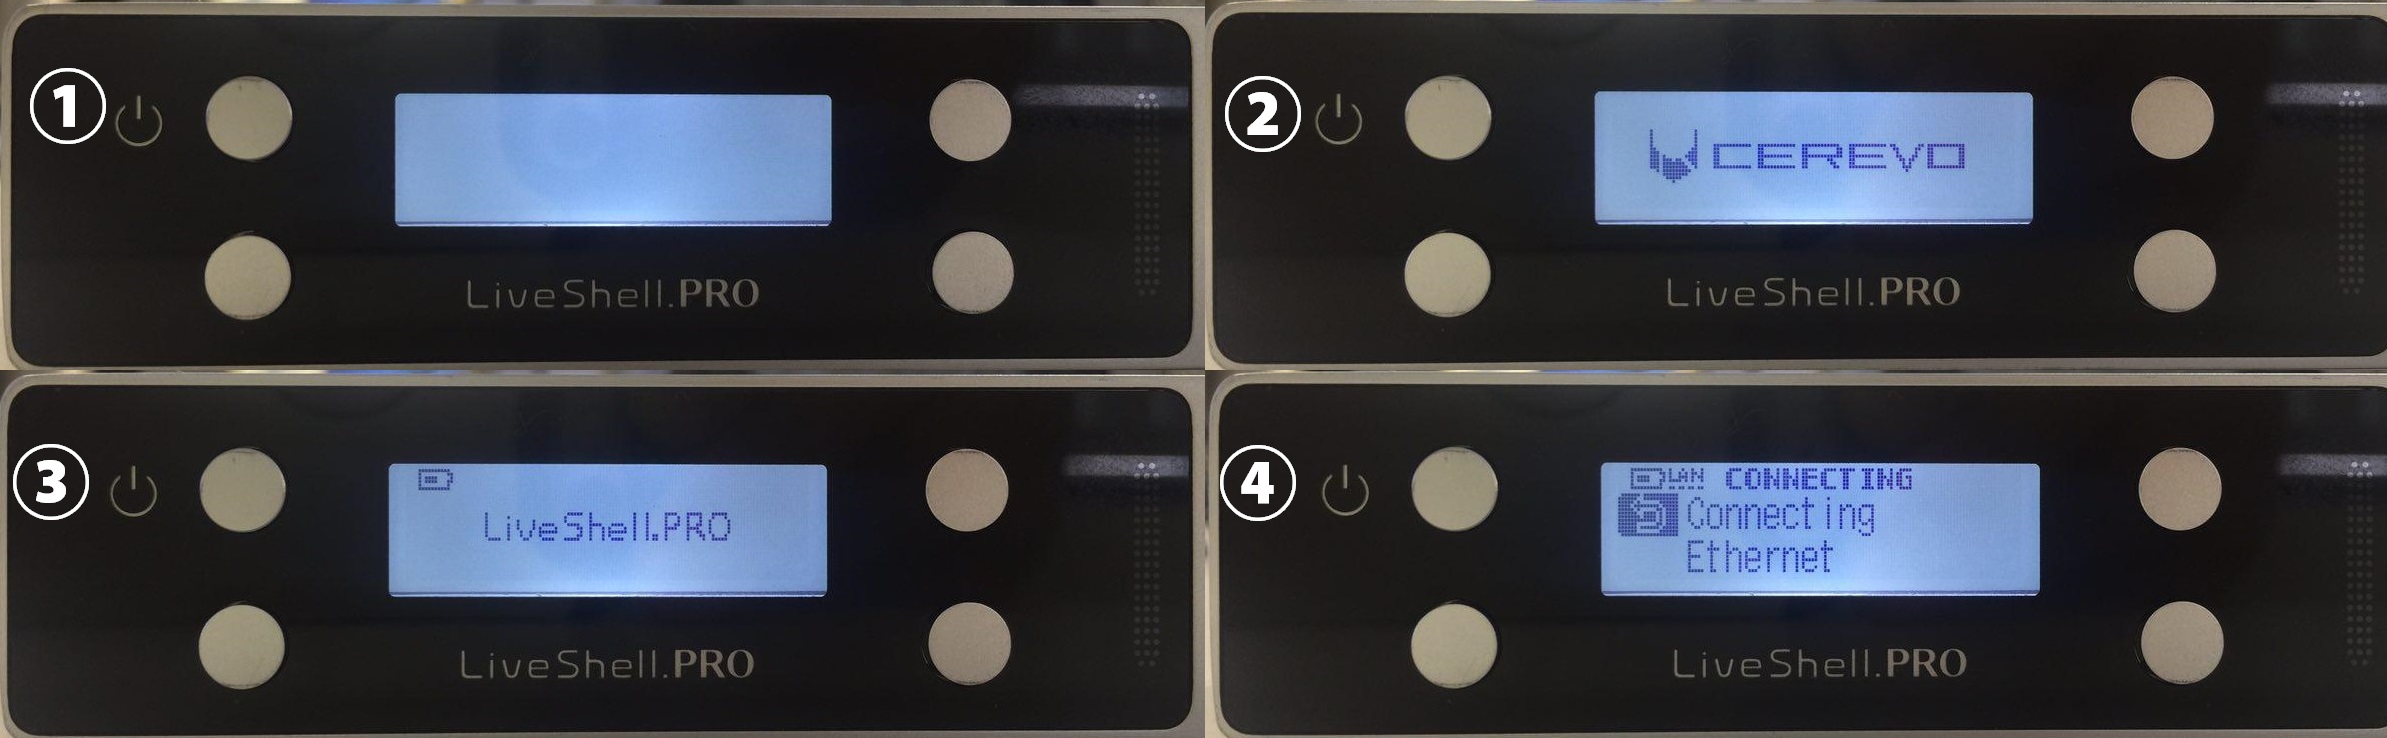
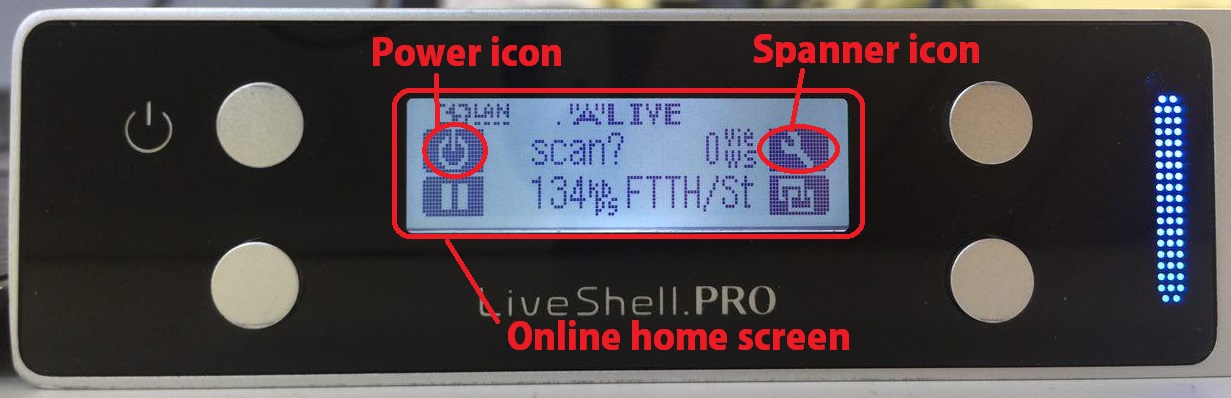
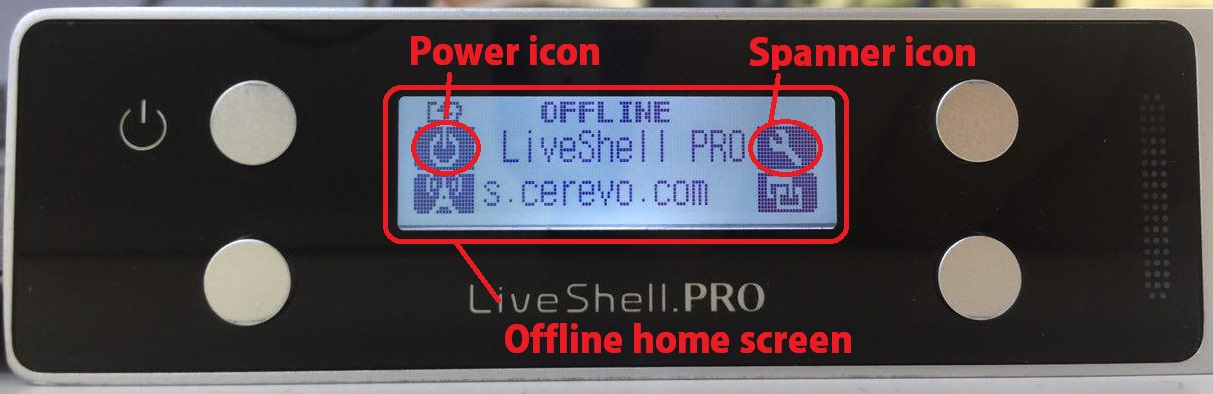
1.Make sure the home screen is displayed on the device. The home screen has a power icon and a spanner icon.
photo_2016-07-07_12-42-21

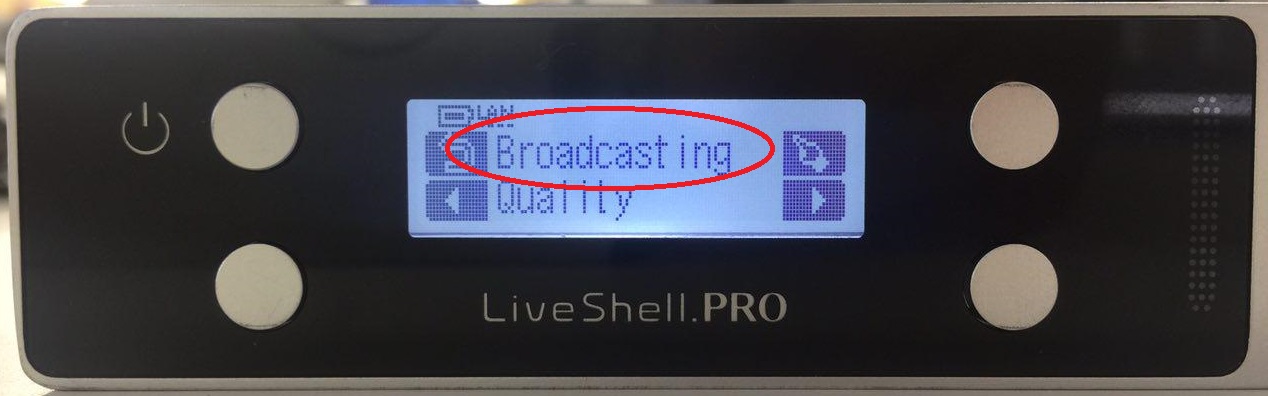
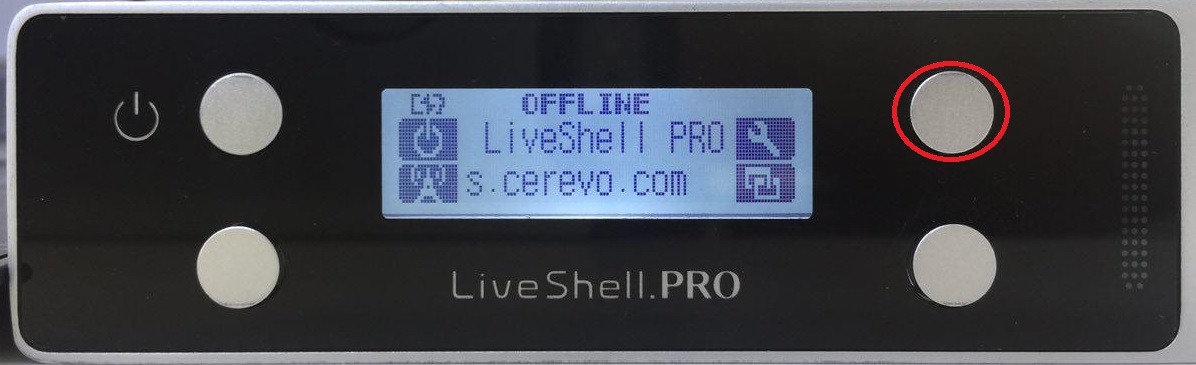
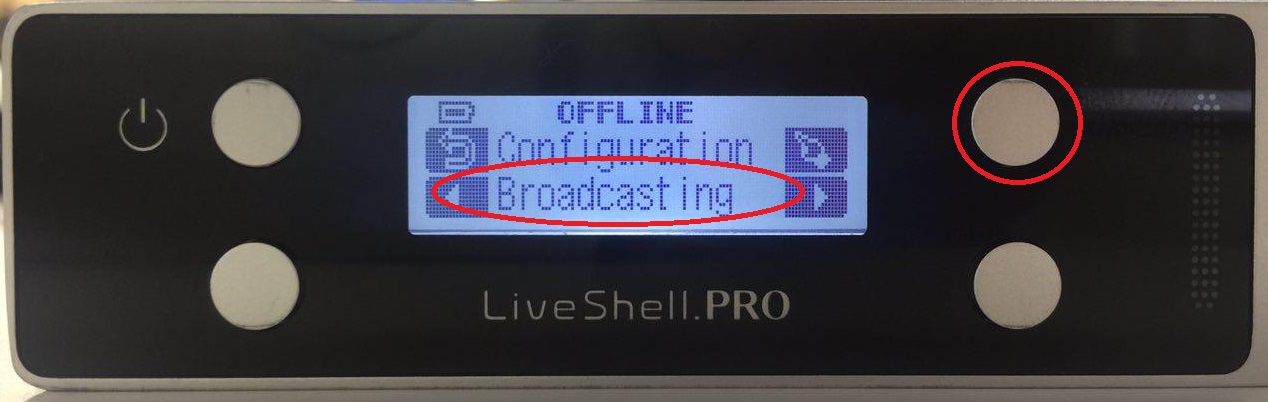
2. Press the upper right button and go to “Broadcasting”.
f
q

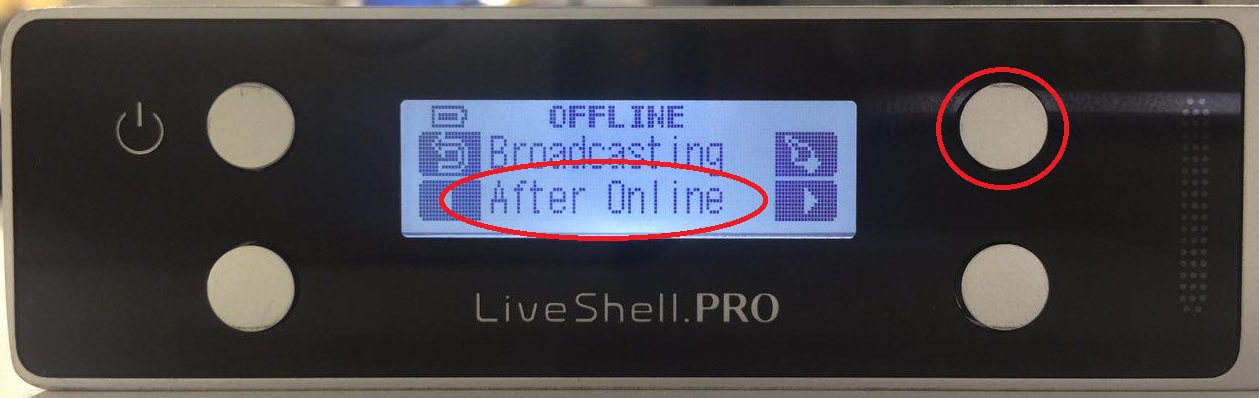
3.Select “After online” and press the upper right button.
b

4. Select Auto Broadcast/Stay Stopped/Auto Pause
c
e
d

If LiveShell PRO is offline

1. Make sure the home screen is displayed on the device. The home screen has a power icon and a spanner icon.
photo_2016-07-07_12-40-16

2.Press the upper right button, then go to “Configuration”.
b
a

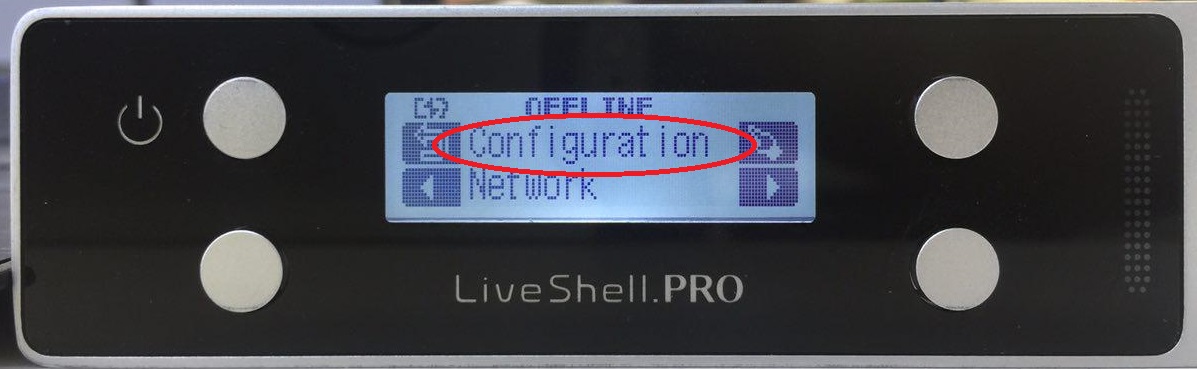
3. Select “Broadcasting” and press the upper right button.
a
4.Select “After online” and press the upper right button.
b

5. Select Auto Broadcast/Stay Stopped/Auto Pause
c
e
d


Cable specifications for AV-OUT

An RCA cable (Male to Male/3.5mm 4 pole plug ) must be used to enable the LiveShell PRO AV-OUT.
Pin assignment from the head is L/R/GND/VIDEO.
*Cerevo does not sell AV-OUT cables, please check with your AV cable supplier.

a


LiveShell PRO does not power on

LiveShell PRO should turn on after pressing the upper left button and holding it 5 seconds if the battery is charged or the AC adapter is connected.

During startup LiveShell PRO completes the following steps.

  1. Turns on back light
  2. Displays Cerevo logo.
  3. Displays LiveShell PRO logo
  4. Checks network access

sample

There may be cases where LiveShell PRO hangs when displaying the Cerevo or LiveShell PRO logo. Please attempt a force shutdown (see this link) and check if the problem is resolved.

If you cannot solve the problem

Please contact our support team (support-global@cerevo.com) and include the following information.

  • At which point the LiveShell PRO hangs.
  • That you have already tried a force shutdown but the problem was not resolved.

Back light turns on but nothing is displayed on LCD

LiveShell PRO should turn on after pressing the upper left button and holding it 5 seconds if the battery is charged or the AC adapter is connected.

During startup LiveShell PRO completes the following steps.

  1. Turns on back light
  2. Displays Cerevo logo.
  3. Displays LiveShell PRO logo
  4. Checks network access

sample

There may be cases where LiveShell PRO hangs when displaying the Cerevo or LiveShell PRO logo. Please attempt a force shutdown (see this link) and check if the problem is resolved.

If you cannot solve the problem

Please contact our support team (support-global@cerevo.com) and include the following information.

  • At which point the LiveShell PRO hangs.
  • That you have already tried a force shutdown but the problem was not resolved.

Device hangs after displaying “Cerevo” or “LiveShell PRO” logo

LiveShell PRO should turn on after pressing the upper left button and holding it 5 seconds if the battery is charged or the AC adapter is connected.

During startup LiveShell PRO completes the following steps.

  1. Turns on back light
  2. Displays Cerevo logo.
  3. Displays LiveShell PRO logo
  4. Checks network access

sample

There may be cases where LiveShell PRO hangs when displaying the Cerevo or LiveShell PRO logo. Please attempt a force shutdown (see this link) and check if the problem is resolved.

If you cannot solve the problem

Please contact our support team (support-global@cerevo.com) and include the following information.

  • At which point the LiveShell PRO hangs.
  • That you have already tried a force shutdown but the problem was not resolved.

Cannot add new network settings

Normally you are able to add a nework settings by following the steps at this link.

However there could be a case that adding network does not succeed.

The Play button is shown on the setup page but nothing happens after clicking it.
a

Please check the following things if a similar problem happen.

<Point 1 >
Please check if the PC or smartphone audio out and LiveShell PRO MIC-IN are connected securely using the included setup cable.

Setup information is sent via sound from the PC or smartphone to LiveShell PRO and can fail if there is not a secure connection.


b

<Point 2>
Please check if the PC or smartphone is set to max volume

Setup information is sent via sound from the PC or smartphone to LiveShell PRO and setup may fail if the PC or smartphone volume level is too low or muted. We recommend that the PC or smartphone is set to max volume before pressing the play button on the setup page.

<Point 3>
Please check the PC or smartphone is not playing any other audio

LiveShell PRO cannot receive the correct setup information if the PC or smartphone is playing any other audio as setup information is sent as sound.

When the problem is not solved

Please contact our support team (support-global@cerevo.com) and include the following information.

  • That you have already checked the points above.
  • The current firmware version of your LiveShell PRO
  • Which brower (Internet Explorer, Google Chrome, Firefox etc.) and version you are using.

How to delete an unused device ID

LiveShell series devices are managed via device IDs on Dashboard.
SnapCrab_Dashboard LiveShell PRO - Google Chrome_2016-7-11_10-19-48_No-00

Currently device IDs can not be deleted by end users.

If you have LiveShell devices IDs that you want to remove, please inform our support team (support-global@cerevo.com) of your registered Dashboard email address and the unused device IDs you want to delete so they can be removed.


The message “Username or password is incorrect” is shown on Dashboard even if entering correct Ustream account information

Since 3rd September 2015  Ustream has required you to create a channel on your Ustream account to broadcast.

If you do not create a channel, the message “Username or password is incorrect” will be shown on Dashboard even if entering correct Ustream account information.

Please create a channel on Ustream to solve this problem. For more information about creating a channel, see this link.

1

Using LiveShell PRO in a closed local network

Typically LiveShell PRO is used in an environment that has an internet connection.

But you can also broadcast video and audio using local mode to a closed local network.

LiveShell PRO needs internet connection to communicate with the Dashboard server for remote control. In local mode LiveShell PRO will not communicate with any outside networks and as a result of that, Dashboard is unavailable in local mode.

Please see this link for setting up local mode.

How to broadcast to Facebook Live

LiveShell PRO can broadcast to Facebook Live by following the below instructions.

Facebook Live Restrictions
*Dashboard preview is not available.
*Broadcasting to an individual account is not available, you may only broadcast to a Facebook page.
*Please check Facebook’s own official guide if you are having any issues.

1.Get RTMP URL and stream key

1-1. Open a browser window, login to your Facebook account, go to your managed page and click on [Publishing Tools] in the page controls menu.
fblive1a

1-2. On the publishing tools screen click [Videos] on the left hand menu then click the [+Live] button.
fblive2

1-3. On the Create live video window, make a note or copy the [Server URL] and [Stream key] fields.
fblive3

2.Dashboard settings

2-1. Access Dashboard and login to your Dashboard account.

2-2. Click [Settings] on the top right of Dashboard.
ub202_en_cap_setting01

2-3. Select [Other broadcasting services (specify RTMP URL)] from the pulldown list of Broadcasting Services.
1

2-4. Enter the RTMP server information from Facebook as follows –
Server URL>Broadcasting RTMP URL
Stream key>Stream
Leave [Browsing RTMP URL] blank.
2-5. Click the [Save and set as default] button. Then click [x] to close the set up window.
ub20x_cap_en_dashboardother01

3.Start broardcasting

Click [START LIVE] on Dashboard.
2